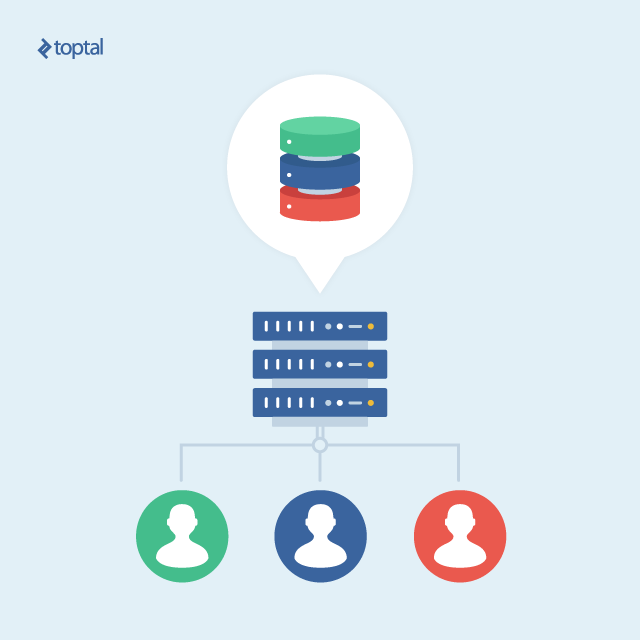
When we talk about cloud applications where each client has their own separate data, we need to think about how to store and manipulate this data. Even with all the great NoSQL solutions out there, sometimes we still need to use the good old relational database. The first solution that might come to mind to separate data is to add an identifier in every table, so it can be handled individually. That works, but what if a client asks for their database? It would be very cumbersome to retrieve all those records hidden among the others.

The Hibernate team came up with a solution to this problem a while ago. They provide some extension points that enable one to control from where data should be retrieved. This solution has the option to control the data via an identifier column, multiple databases, and multiple schemas. This article will cover the multiple schemas solution.
So, let’s get to work!
Getting Started
If you are a more experienced Java developer and know how to configure everything, or if you already have your own Java EE project, you can skip this section.
First, we have to create a new Java project. I am using Eclipse and Gradle, but you can use your preferred IDE and building tools, such as IntelliJ and Maven.
If you want to use the same tools as me, you can follow these steps to create your project:
- Install Gradle plugin on Eclipse
- Click on File -> New -> Other…
- Find Gradle (STS) and click Next
- Inform a name and choose Java Quickstart for sample project
- Click Finish
Great! This should be the initial file structure:
javaee-mt
|- src/main/java
|- src/main/resources
|- src/test/java
|- src/test/resources
|- JRE System Library
|- Gradle Dependencies
|- build
|- src
|- build.gradle
You can delete all files that come inside the source folders, as they are just sample files.
To run the project, I use Wildfly, and I will show how to configure it (again you can use your favorite tool here):
- Download Wildfly: http://wildfly.org/downloads/ (I am using version 10)
- Unzip the file
- Install the JBoss Tools plugin on Eclipse
- On the Servers tab, right-click any blank area and choose New -> Server
- Choose Wildfly 10.x (9.x also works if 10 is not available, depending on your Eclipse version)
- Click Next, choose Create New Runtime (next page) and click Next again
- Choose the folder where you unzipped Wildfly as Home Directory
- Click Finish
Now, let’s configure Wildfly to know the database:
- Go to the bin folder inside your Wildfly folder
- Execute add-user.bat or add-user.sh (depending on your OS)
- Follow the steps to create your user as Manager
- In Eclipse, go to the Servers tab again, right-click on the server you created and select Start
- On your browser, access http://localhost:9990, which is the Management Interface
- Enter the credentials of the user you just created
- Deploy the driver jar of your database:
- Go to the Deployment tab and click Add
- Click Next, choose your driver jar file
- Click Next and Finish
- Go to the Configuration tab
- Choose Subsystems -> Datasources -> Non-XA
- Click Add, select your database and click Next
- Give a name to your data source and click Next
- Select the Detect Driver tab and choose the driver you just deployed
- Enter your database information and click Next
- Click Test Connection if you want to make sure the information of the prior step is correct
- Click Finish
- Go back to Eclipse and stop the running server
- Right-click on it, select Add and Remove
- Add your project to the right
- Click Finish
Alright, we have Eclipse and Wildfly configured together!
This is all the configurations required outside of the project. Let’s move on to the project configuration.
Bootstrapping Project
Now that we have Eclipse and Wildfly configured and our project created, we need to configure our project.
The first thing we are going to do is to edit build.gradle. This is how it should look:
apply plugin: 'java'
apply plugin: 'war'
apply plugin: 'eclipse'
apply plugin: 'eclipse-wtp'

sourceCompatibility = '1.8'
compileJava.options.encoding = 'UTF-8'

compileJava.options.encoding = 'UTF-8'
compileTestJava.options.encoding = 'UTF-8'


repositories {
    jcenter()
}

eclipse {
    wtp {
    }
}

dependencies {
    providedCompile 'org.hibernate:hibernate-entitymanager:5.0.7.Final'
    providedCompile 'org.jboss.resteasy:resteasy-jaxrs:3.0.14.Final'
    providedCompile 'javax:javaee-api:7.0'
}
The dependencies are all declared as “providedCompile”, because this command doesn’t add the dependency in the final war file. Wildfly already has these dependencies, and it would cause conflicts with the app’s ones otherwise.
At this point, you can right-click your project, select Gradle (STS) -> Refresh All to import the dependencies we just declared.
Time to create and configure the “persistence.xml” file, the file that contains the information that Hibernate needs:
- In the src/main/resource source folder, create a folder called META-INF
- Inside this folder, create a file named persistence.xml
The content of the file must be the something like the following, changing jta-data-source to match the datasource you created in Wildfly and the package com.toptal.andrehil.mt.hibernate to the one you are going to create in the next section (unless you choose the same package name):
<?xml version="1.0" encoding="UTF-8" ?>
<persistence xmlns:xsi="http://www.w3.org/2001/XMLSchema-instance"
    xsi:schemaLocation="http://java.sun.com/xml/ns/persistence http://java.sun.com/xml/ns/persistence/persistence_2_0.xsd"
    version="2.0" xmlns="http://java.sun.com/xml/ns/persistence">
    <persistence-unit name="pu">
        <jta-data-source>java:/JavaEEMTDS</jta-data-source>
        <properties>
            <property name="hibernate.multiTenancy" value="SCHEMA"/>
            <property name="hibernate.tenant_identifier_resolver" value="com.toptal.andrehil.mt.hibernate.SchemaResolver"/>
            <property name="hibernate.multi_tenant_connection_provider" value="com.toptal.andrehil.mt.hibernate.MultiTenantProvider"/>
        </properties>
    </persistence-unit>
</persistence>
Hibernate Classes
The configurations added to persistence.xml point to two custom classes MultiTenantProvider and SchemaResolver. The first class is responsible for providing connections configured with the right schema. The second class is responsible for resolving the name of the schema to be used.
Here is the implementation of the two classes:
public class MultiTenantProvider implements MultiTenantConnectionProvider, ServiceRegistryAwareService {

    private static final long serialVersionUID = 1L;
    private DataSource dataSource;

    @Override
    public boolean supportsAggressiveRelease() {
        return false;
    }
    @Override
    public void injectServices(ServiceRegistryImplementor serviceRegistry) {
        try {
            final Context init = new InitialContext();
            dataSource = (DataSource) init.lookup("java:/JavaEEMTDS"); // Change to your datasource name
        } catch (final NamingException e) {
            throw new RuntimeException(e);
        }
    }
    @SuppressWarnings("rawtypes")
    @Override
    public boolean isUnwrappableAs(Class clazz) {
        return false;
    }
    @Override
    public <T> T unwrap(Class<T> clazz) {
        return null;
    }
    @Override
    public Connection getAnyConnection() throws SQLException {
        final Connection connection = dataSource.getConnection();
        return connection;
    }
    @Override
    public Connection getConnection(String tenantIdentifier) throws SQLException {
        final Connection connection = getAnyConnection();
        try {
            connection.createStatement().execute("SET SCHEMA '" + tenantIdentifier + "'");
        } catch (final SQLException e) {
            throw new HibernateException("Error trying to alter schema [" + tenantIdentifier + "]", e);
        }
        return connection;
    }
    @Override
    public void releaseAnyConnection(Connection connection) throws SQLException {
        try {
            connection.createStatement().execute("SET SCHEMA 'public'");
        } catch (final SQLException e) {
            throw new HibernateException("Error trying to alter schema [public]", e);
        }
        connection.close();
    }
    @Override
    public void releaseConnection(String tenantIdentifier, Connection connection) throws SQLException {
        releaseAnyConnection(connection);
    }
}
The syntax being used in the statements above work with PostgreSQL and some other databases, this must be changed in case your database has a different syntax to change the current schema.
public class SchemaResolver implements CurrentTenantIdentifierResolver {

    private String tenantIdentifier = "public";

    @Override
    public String resolveCurrentTenantIdentifier() {
        return tenantIdentifier;
    }
    @Override
    public boolean validateExistingCurrentSessions() {
        return false;
    }
    public void setTenantIdentifier(String tenantIdentifier) {
        this.tenantIdentifier = tenantIdentifier;
    }
}
At this point, it is already possible to test the application. For now, our resolver is pointing directly to a hard-coded public schema, but it is already being called. To do this, stop your server if it is running and start it again. You can try to run it in debug mode and place breakpoint at any point of the classes above to check if it is working.
Practical Use Of The Resolver
So, how could the resolver actually contain the right name of the schema?
One way to achieve this is to keep an identifier in the header of all requests and then create a filter to inject the name of the schema.
Let’s implement a filter class to exemplify the usage. The resolver can be accessed through Hibernate’s SessionFactory, so we will take advantage of that to get it and inject the right schema name.
@Provider
public class AuthRequestFilter implements ContainerRequestFilter {

    @PersistenceUnit(unitName = "pu")
    private EntityManagerFactory entityManagerFactory;

    @Override
    public void filter(ContainerRequestContext containerRequestContext) throws IOException {
        final SessionFactoryImplementor sessionFactory = ((EntityManagerFactoryImpl) entityManagerFactory).getSessionFactory();
        final SchemaResolver schemaResolver = (SchemaResolver) sessionFactory.getCurrentTenantIdentifierResolver();

        final String username = containerRequestContext.getHeaderString("username");
        schemaResolver.setTenantIdentifier(username);
    }
}
Now, when any class gets an EntityManager to access the database, it will be already configured with the right schema.
For the sake of simplicity, the implementation shown here is getting the identifier directly from a string in the header, but it is a good idea to use an authentication token and store the identifier in the token. If you are interested in knowing more about this subject, I suggest taking a look at JSON Web Tokens (JWT). JWT is a nice and simple library for token manipulation.
How to Use All of This
With everything configured, there is nothing else needed to do in your entities and/or classes that interact with EntityManager. Anything you run from an EntityManager will be directed to the schema resolved by the created filter.
Now, all you need to do is to intercept requests on the client side and inject the identifier/token in the header to be sent to the server side.
The link at the end of the article points to the project used to write this article. It uses Flyway to create 2 schemas and contains an entity class called Car and a rest service class called CarService that can be used to test the project. You can follow all the steps below, but instead of creating your own project, you can clone it and use this one. Then, when running you can use a simple HTTP client (like Postman extension for Chrome) and make a GET request to http://localhost:8080/javaee-mt/rest/cars with the headers key:value:
- username:joe; or
- username:fred.
By doing this, the requests will return different values, which are in different schemas, one called joe and the other one called “fred”.
Final Words
This is not the only solution to create multitenancy applications in the Java world, but it is a simple way to achieve this.
One thing to keep in mind is that Hibernate doesn’t generate DDL when using multitenancy configuration. My suggestion is to take a look at Flyway or Liquibase, which are great libraries to control database creation. This is a nice thing to do even if you are not going to use multitenancy, as the Hibernate team advises to not use their auto database generation in production.
The source code used to create this article and environment configuration can be found at github.com/andrehil/JavaEEMT
This article was written by André William Prade Hildinger, a Toptal Javascript developer.


Add Comment